

Would you believe that you can create your own website in just one minute? In the past, building a website required a whole team of specialists – now you can do that yourself using an AI-powered website generator.
The process is quite simple: write a short prompt describing your future website, add your contact details, upload photos, choose a design – that’s it. You don’t even need to know how to code or be a copywriting guru, because the language model does everything for you.
In this article, we’ll take a closer look at how the HostPro AI generator works and show you the entire process of creating your own website step by step.
What You Get from Using an AI Website Generator
An AI generator allows you to quickly and freely create a fully functional website. Along with the generator, you receive a pre-installed WordPress setup with admin panel access immediately after placing your order. There, you can add any plugins and expand your site’s functionality as needed.
When comparing HostPro’s AI generator with other AI-based website builders, site autonomy will go first. With HostPro, you have full access to your website files, database, and hosting control panel. Traditional builders usually host sites on their own servers, meaning users don’t have extended access – which makes transferring your site to another hosting provider nearly impossible.
The AI generator is especially beneficial for small and medium-sized businesses with limited budgets and resources. Its main advantages include:
- the fastest way to generate a free website;
- a unique design that doesn’t look like a typical template;
- AI automatically fills the site with content – from button labels to blog posts;
- full editing access after generation;
- a responsive website with high loading speed;
- daily backups by the hosting provider, so you can always restore a previous version.
You can find a detailed article describing all the benefits of HostPro’s AI Website Generator here.
Step-by-Step Guide: How to Create a Website with HostPro’s AI Generator
Let’s move from theory to practice. Imagine we own a flower shop and want to create our very first website. Here’s where we begin:
1. Order Hosting
First, you need to order WordPress hosting with a built-in AI generator. Choose the plan that suits you best and click “Order.”
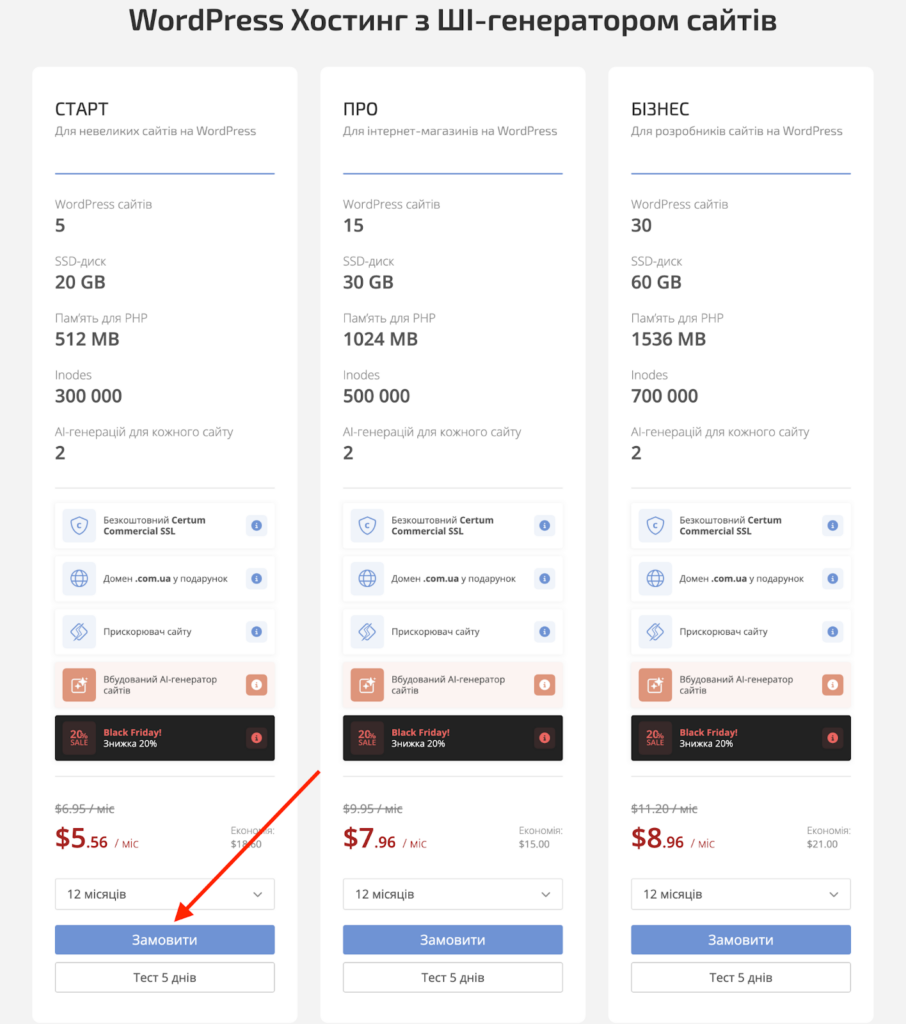
Then, select a domain for your future website. In this window, you can:
- register a new domain;
- transfer an existing one from another registrar;
- or use a domain you already own by simply updating the name servers.
Next, complete the remaining registration steps: choose your billing period, data center location and any additional services you need. After that, enter your personal details and complete the order.
2. Access the WordPress Admin Panel
Once your service is activated, go to your Client Area. In the Active Services section, click “Manage”, and then click it again.
On the left sidebar, select “WordPress Management.”
Next, click the “Edit” icon.
Then, open the WordPress admin panel by selecting “wp-admin Dashboard” on the left.
3. Describe Your Future Website
Now you’re on the AI Generator page. The first step is to enter your website name, its topic (in English) and choose the interface language.
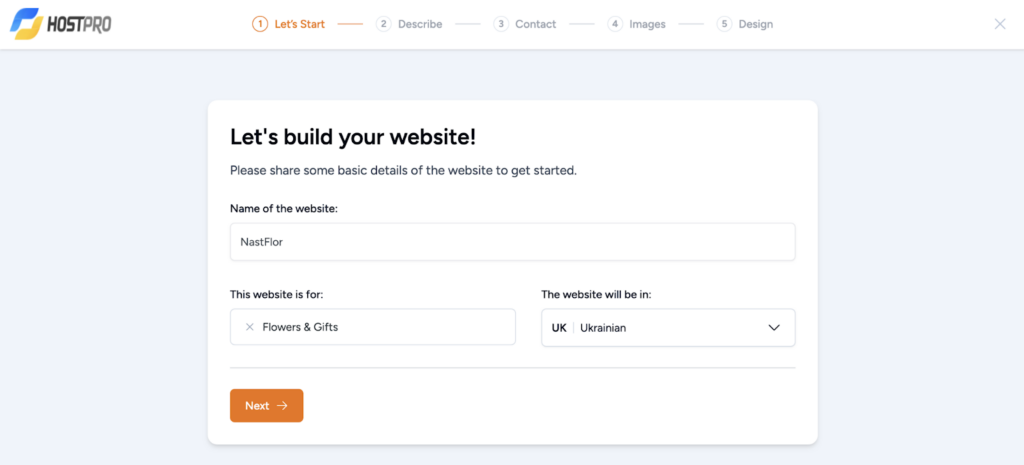
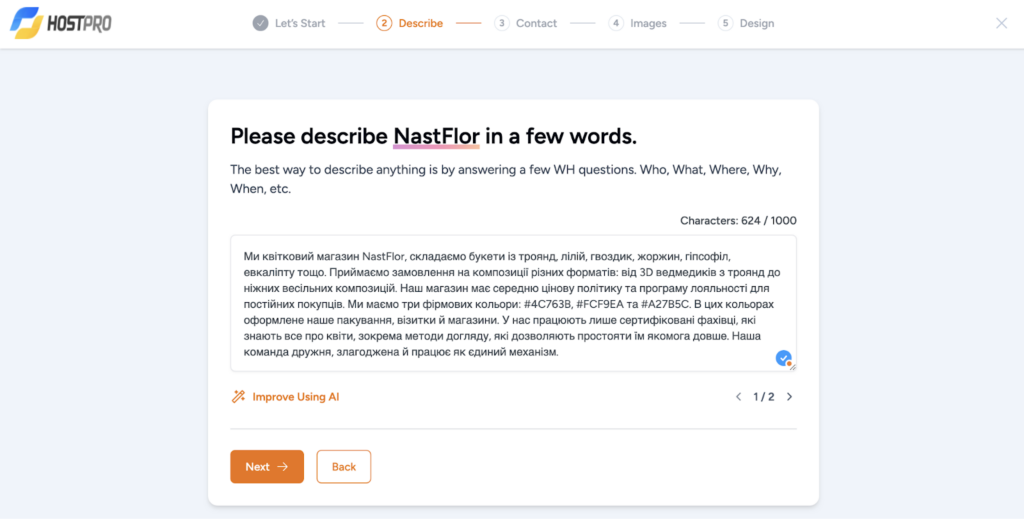
Once the technical setup is done, move on to the creative part – visualize your future website and write a short description.
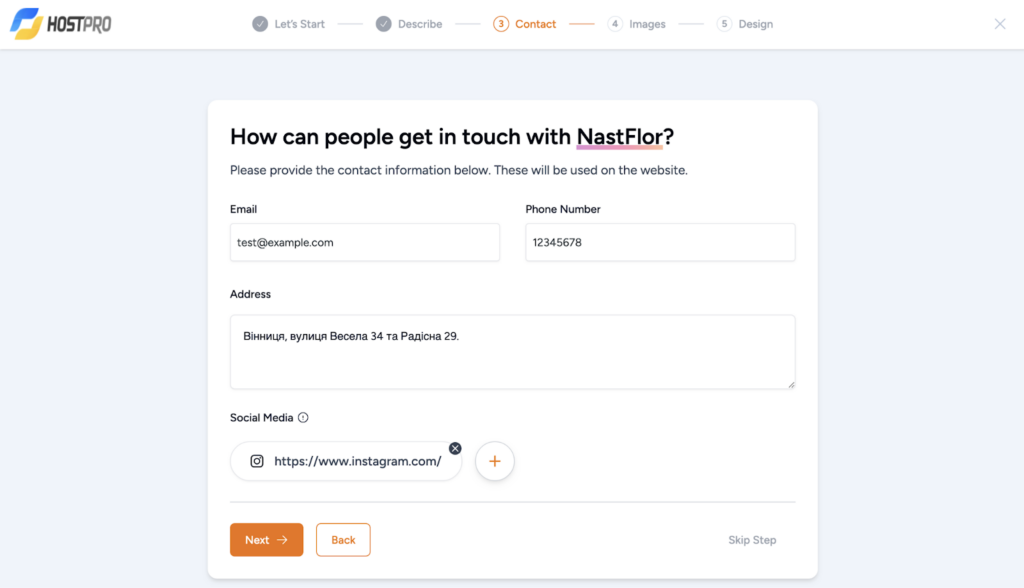
Then, fill in your contact information that will appear on the site: email address, phone number, and physical address. You can also add links to your social media profiles, such as Facebook, X (formerly Twitter), Instagram or YouTube.
Based on your description, the AI will suggest themed images for your site. Choose the most suitable ones or upload your own if none of the suggested images fit your vision. You can review all selected or uploaded images under the “Selected Images” tab.
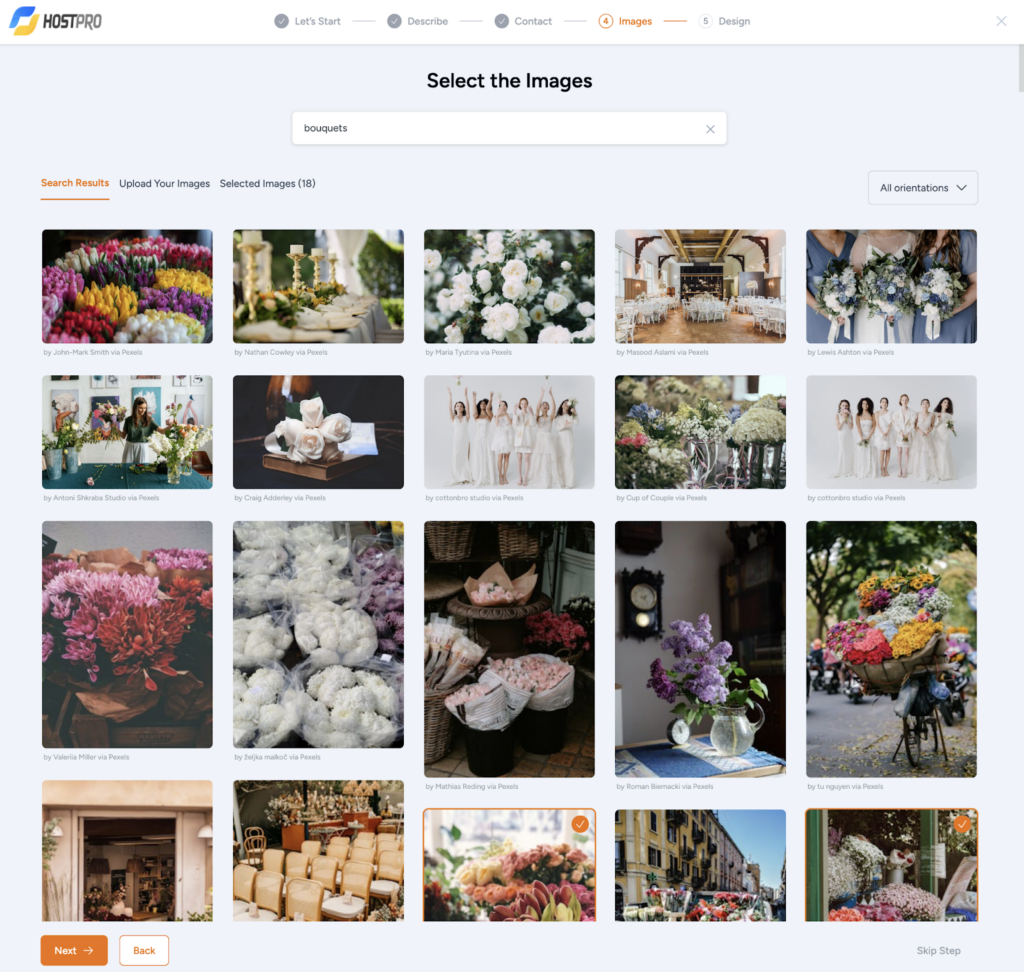
4. Choose and Customize the Design
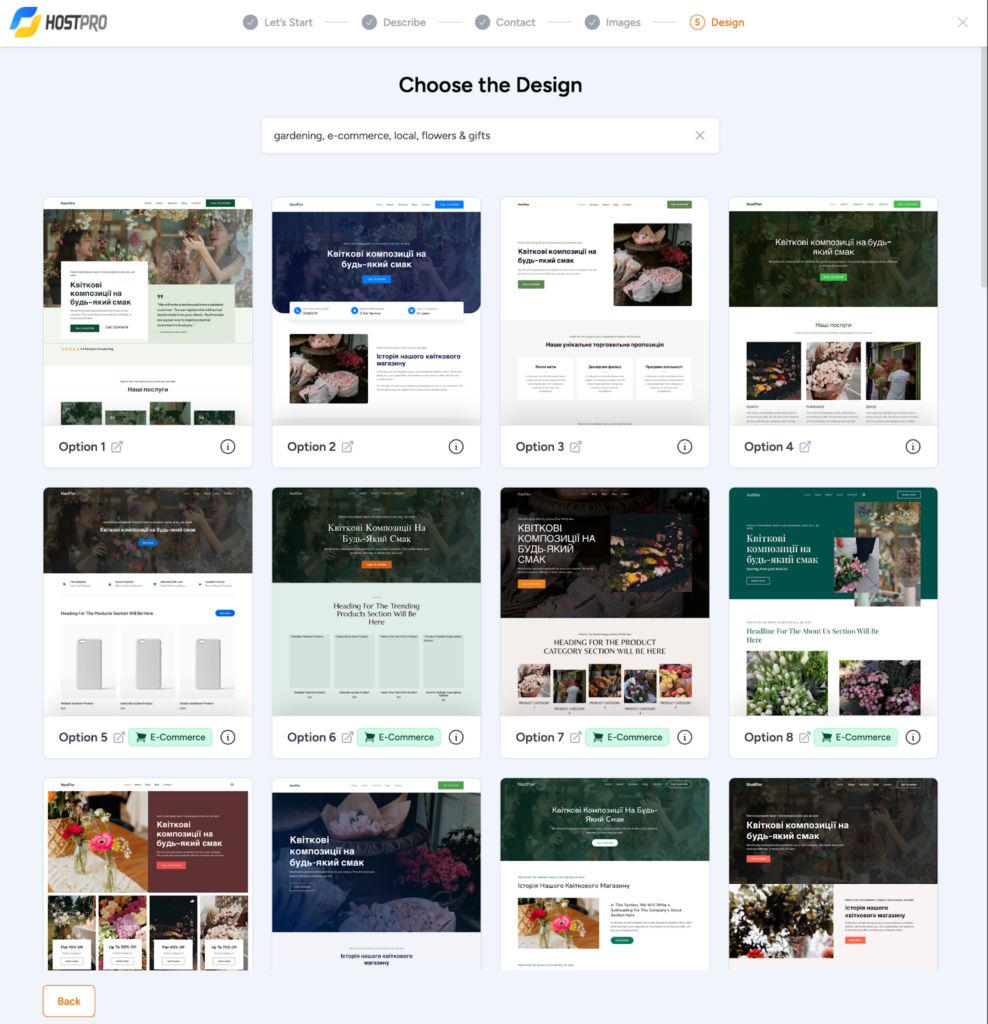
Using the information you’ve provided, the AI will generate several design options for your website. When you hover over a layout, it will start scrolling so you can preview the full page. Choose your favorite option and click to select it.
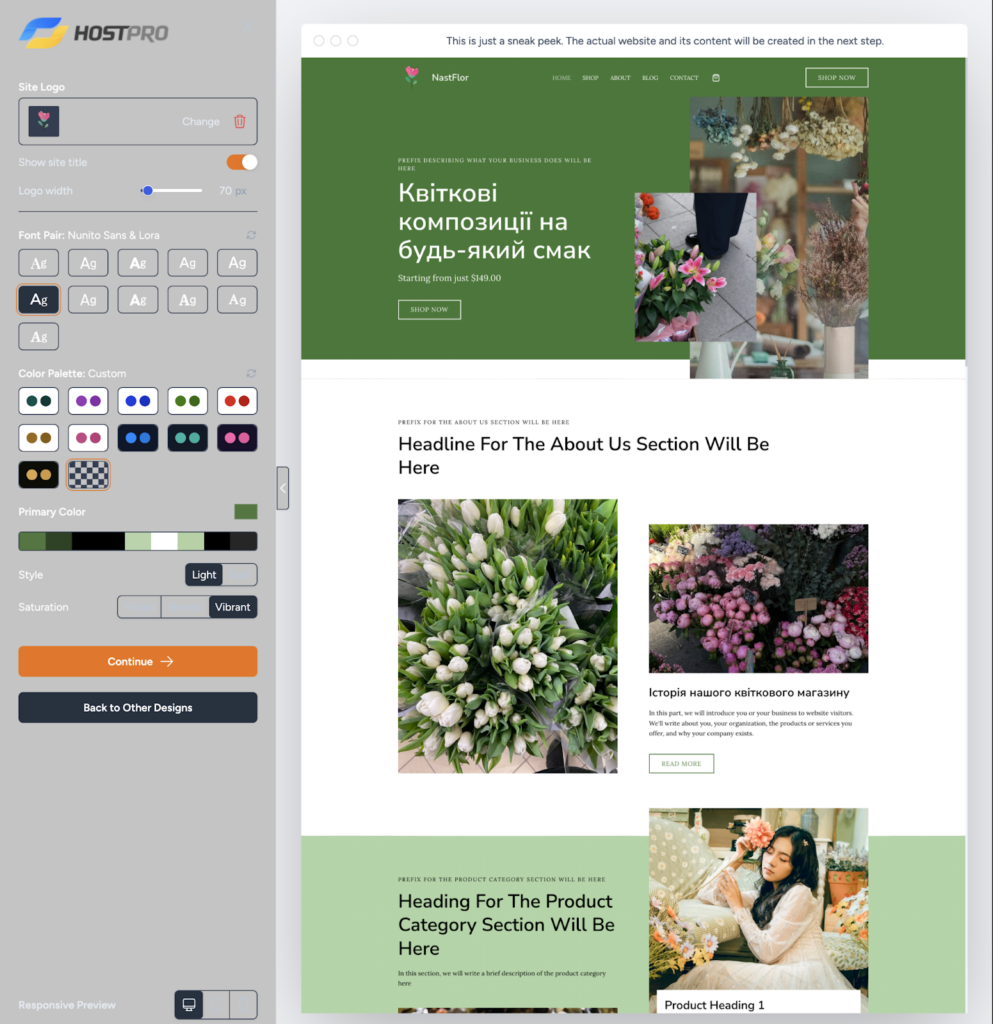
A template editing window will appear. Here, you can upload your logo, change fonts, color scheme, saturation, and theme style. You can also preview how your site will look on different devices. When everything looks good, click “Continue.”
Note that your website will be fully responsive and display correctly on any screen resolution.
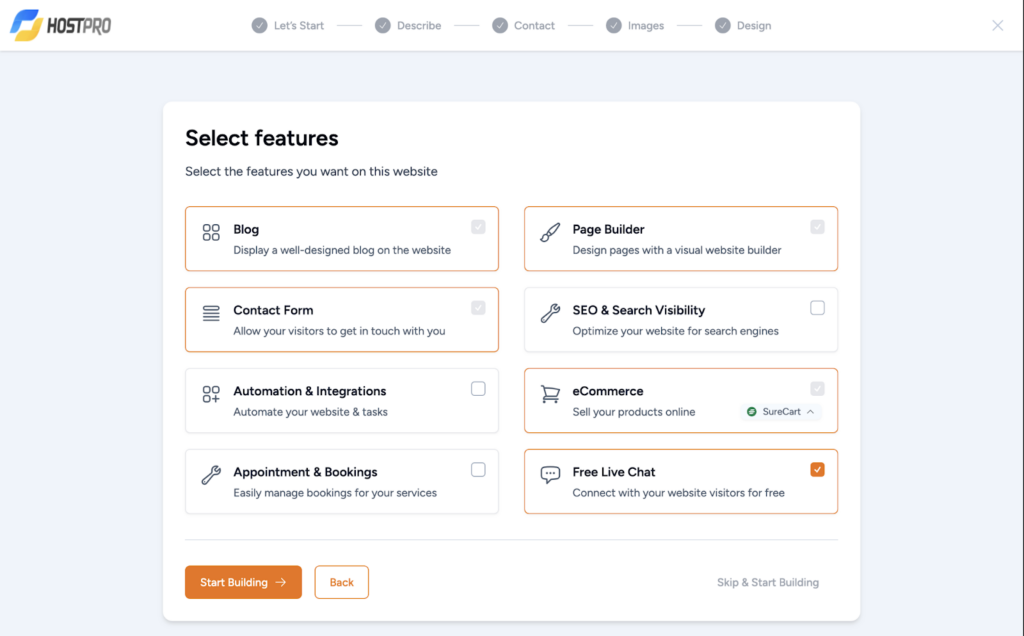
Next, choose any additional features you want and click “Start Building.” (You can skip this step if you prefer.)
5. Wait for the AI to Generate Your Website
Now that you’ve set all the parameters for your new site, you can sit back and relax – the generator will do the rest.
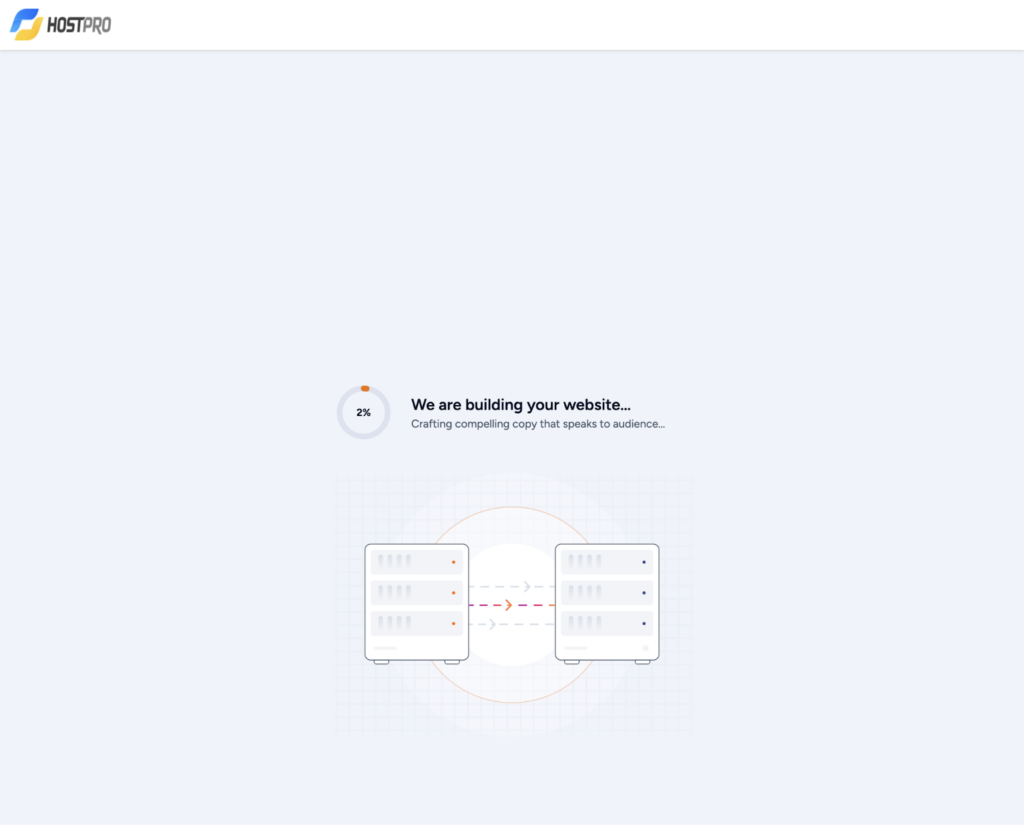
Before your tea even finishes brewing, your website will be ready! Click “See Your Website” to preview the result.

6. Get Your Finished Website
Here we have our beautiful flower shop website – fully functional, with all pages, buttons, and forms working perfectly.
If you’d like to edit something, you can modify any part of the site from the WordPress admin panel. Simply click on your website’s name in the top bar (in our example, it’s “NastFlor”).
Conclusion
And there you have it – proof that creating your own website isn’t difficult at all, especially with HostPro’s AI Generator. Everything happens quickly, without the need to understand coding or web design principles. All you need to do is describe your business – and artificial intelligence will take care of the rest.